This is a shorten version of our Comprehensive Non-woven Installation Guide. If you would like to see the full version, please proceed here:
Installing Non-Woven Wallpaper
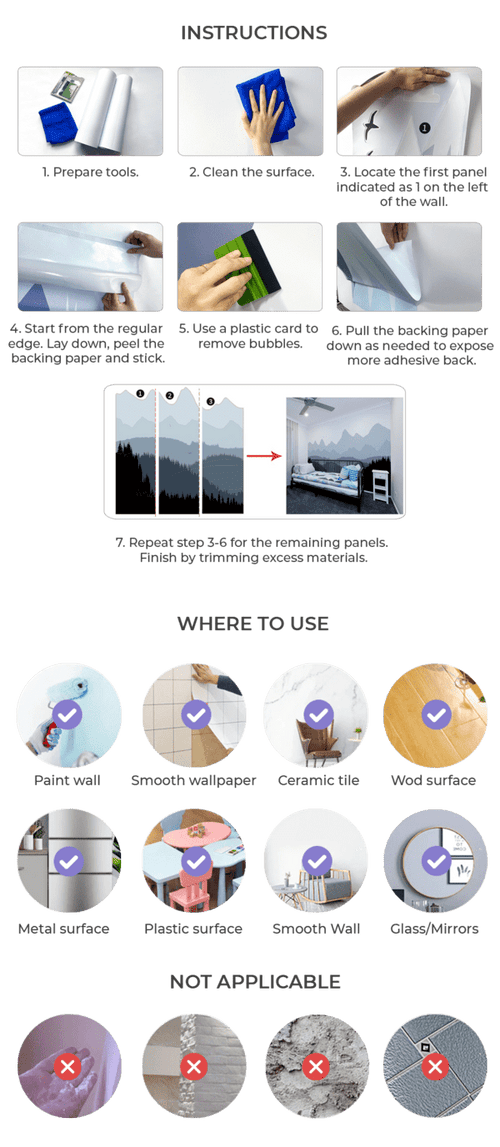
Suitable for: Walls, ceilings, various interior surfaces (plaster, plasterboard, etc.)
Preparation: Clean walls, fix unevenness, remove old wallpaper/paint. Prime if needed (fresh plaster, etc.).
Necessary tools: Wallpaper, non-woven adhesive, knife, straightedge, smoother, level/plumb line, pencil, roller/tray (optional), sponge, stepladder (optional).
Cutting: Measure strip height (room height + 5cm for trimming). Match pattern if applicable. Mark top of strip.
Hanging:
- Start at window, work towards door.
- Use plumb line for straight application.
- Butt seams for best look (except corners).
- Turn off electricity for outlets/switches. Cut openings after applying wallpaper.
- Overhang wallpaper in window recesses, trim precisely later.
- Fold wallpaper back 10-15cm for radiators.
- Work in pairs for ceilings.
Applying Adhesive: Follow manufacturer's instructions (wall or wallpaper back). Use roller (if applicable) for even spread. For our Non-woven wallpapers, apply adhesive directly to the wall using a roller for even spread.
Hanging Strips:
- Roll wallpaper strips face inwards.
- Place roll on adhesive-coated surface.
- Unroll gradually, press firmly with rubber roller.
- Trim excess at bottom with knife and straightedge.
Cleaning: Remove excess adhesive with damp cloth.
Borders (Optional): Mark placement with pencil and ruler.









Share and get 15% off!
Simply share this product on one of the following social networks and you will unlock 15% off!